零、物料
1、小米米家智能插座WiFi版/Mi Smart Wi-Fi Plug,即chuangmi.plug.m3,固件版本:1.3.9_0006
2、Home Assistant 0.113.0,As a virtual appliance (x86_64/UEFI)
一、Hassos安装
官网为https://www.home-assistant.io/hassio/installation,我们选择VMWare Workstation使用VMDK(虚拟机中指定“使用现有虚拟磁盘”),官网的说法是:
For Vmware Workstation create a new virtual machine, select “Custom”, make it compatible with the default of Workstation and ESX, Choose “I will install the operating system later”, select “Linux” -> “Other Linux 5.x or later kernel 64-bit”, give it atleast 2GB RAM and 1vCPU, select “Use Bridged Networking” then “Use an existing virtual disk” and select the VMDK file above, after creation of VM go to “Settings” and “Options” then “Advanced” and select “Firmware type” to “UEFI”
主要注意两点:
1、硬盘必须使用IDE类型,否则启动时卡死(见参考资料1);默认在VMWare中创建的是SCSI硬盘,需要删掉后重新建一个IDE类型的;
2、引导方式必须使用UEFI;
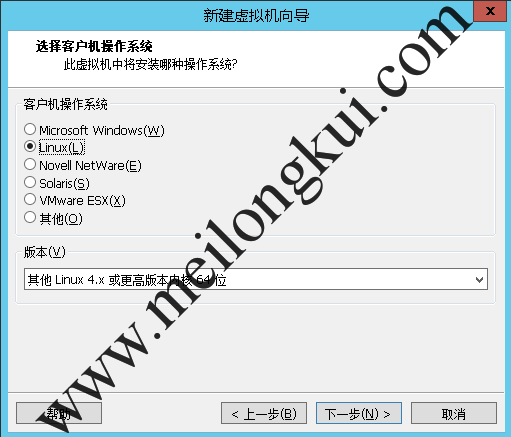
使用Home Assistant的VMDK1
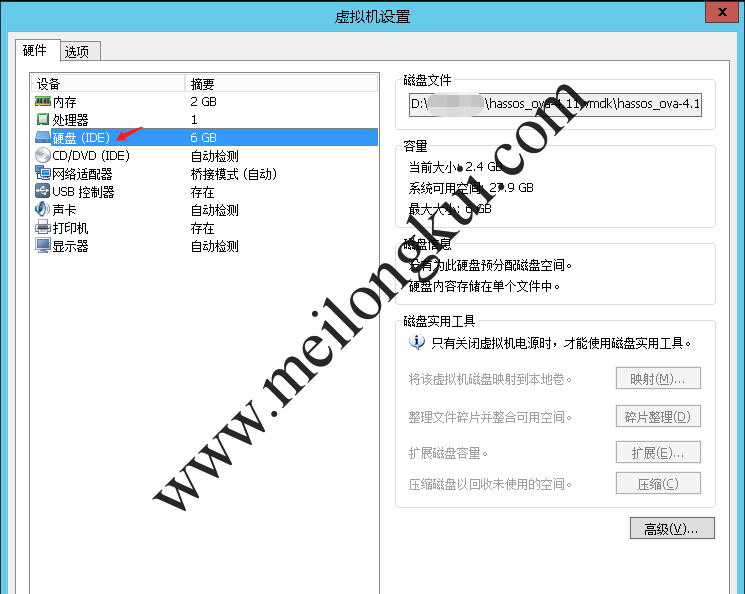
使用Home Assistant的VMDK2
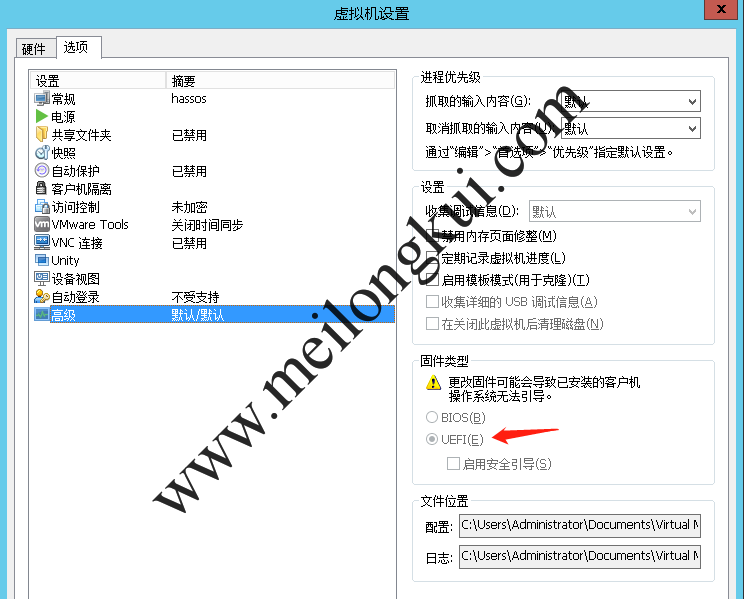
使用Home Assistant的VMDK3
如果硬盘类型使用的是默认的SCSI类型,那么会卡死:
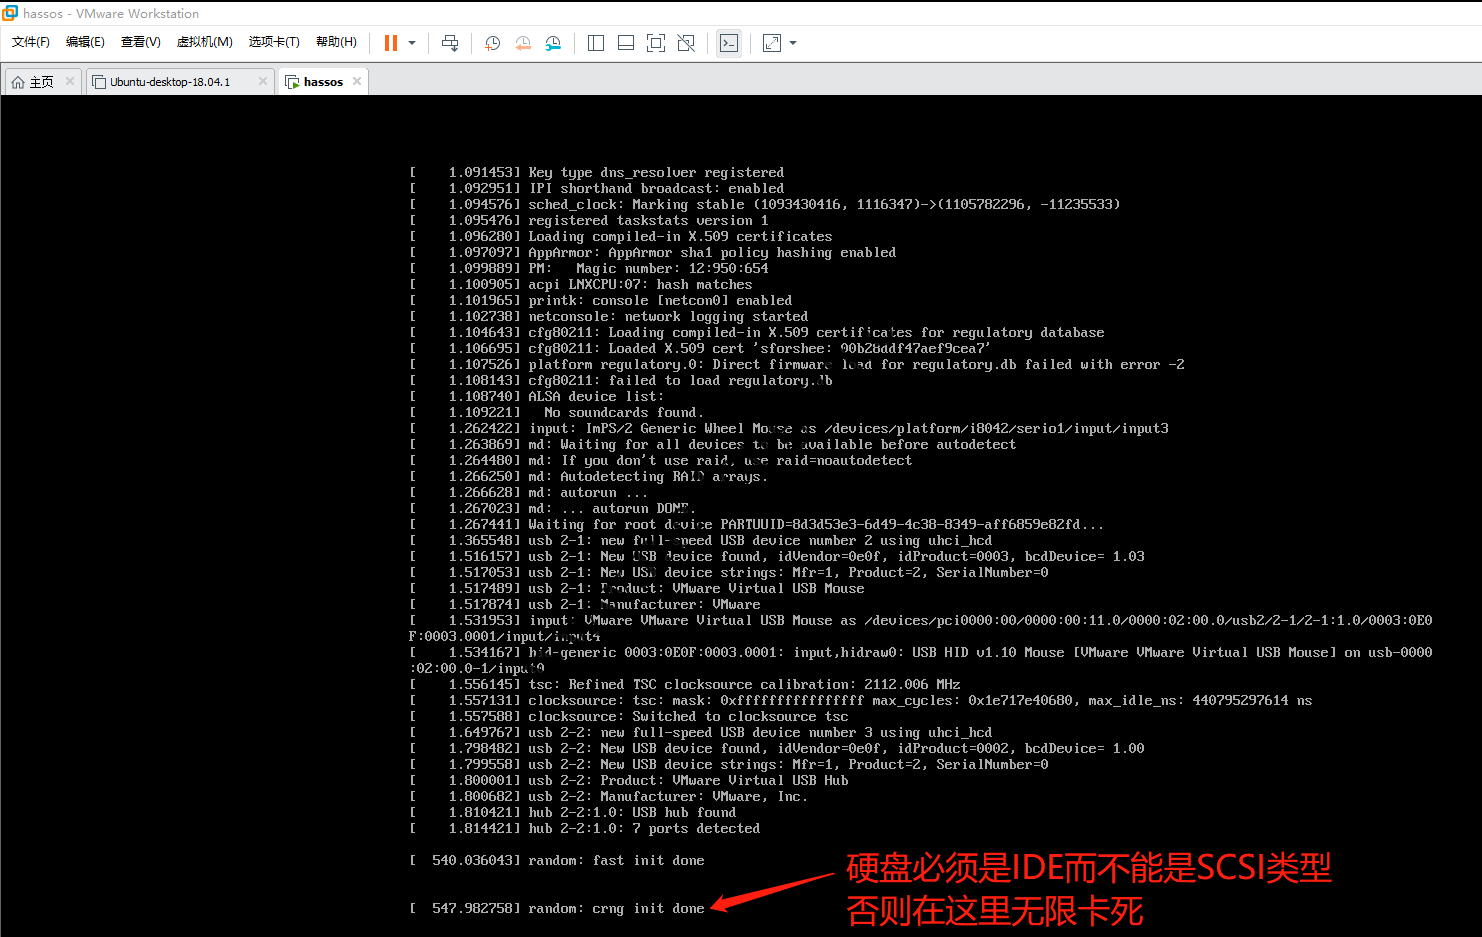
Home Assistant VMDK必须使用IDE类型硬盘否则卡死在random: crng init done
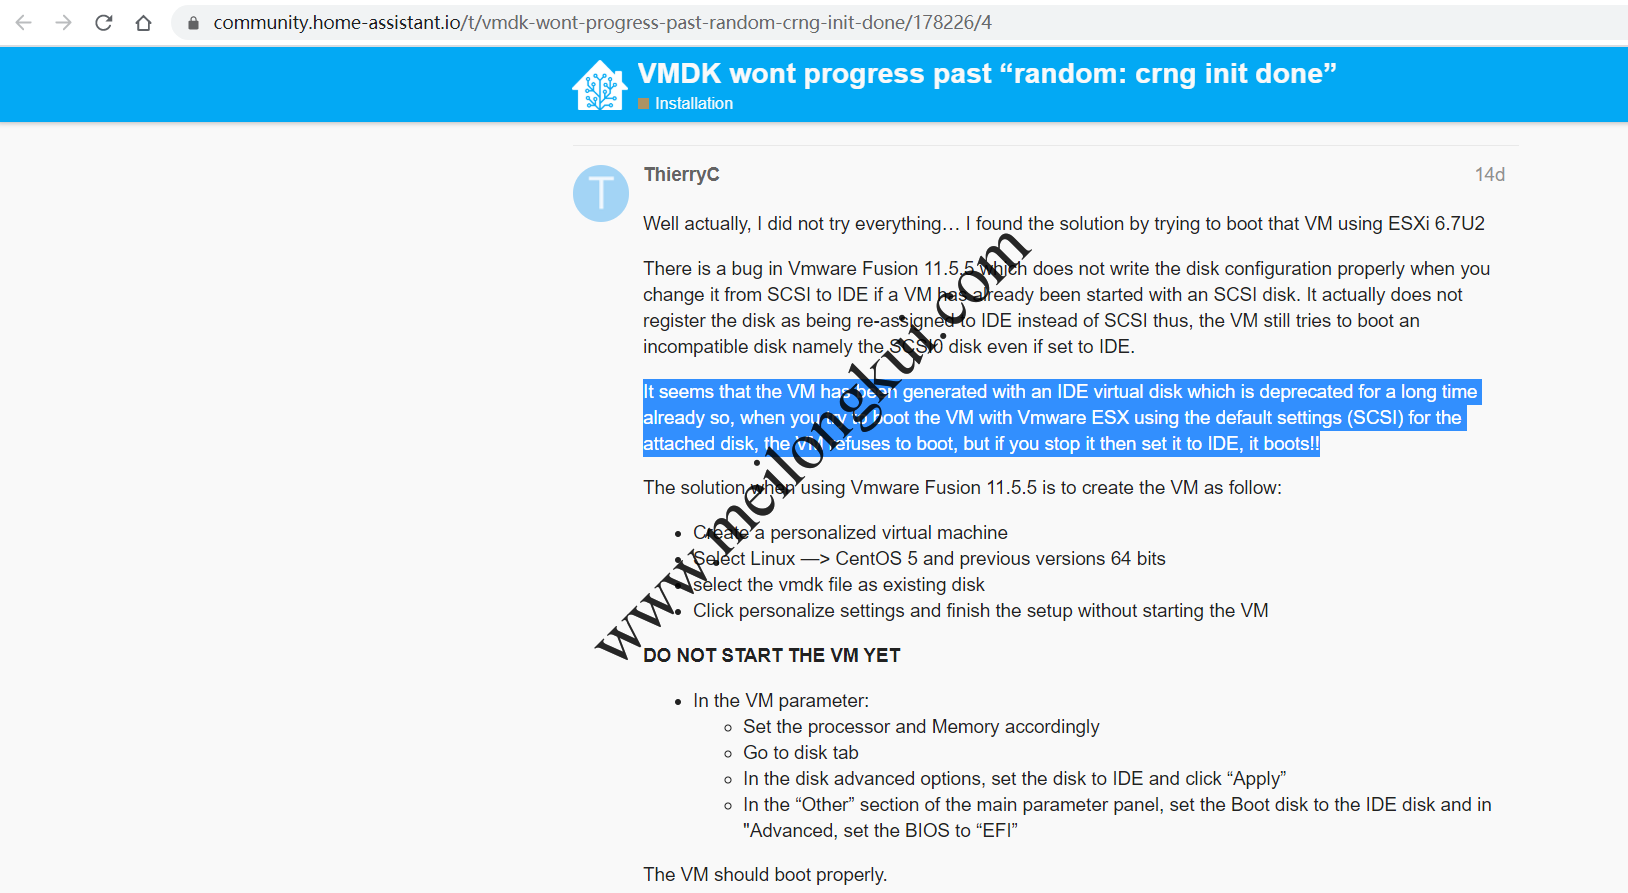
Home Assistant VMDK必须使用IDE类型硬盘否则卡死在random: crng init done2
二、获取Token
Home Assistant需要使用32位的token来操作设备,方法有几种。
1、使用miio(https://github.com/aholstenson/miio)
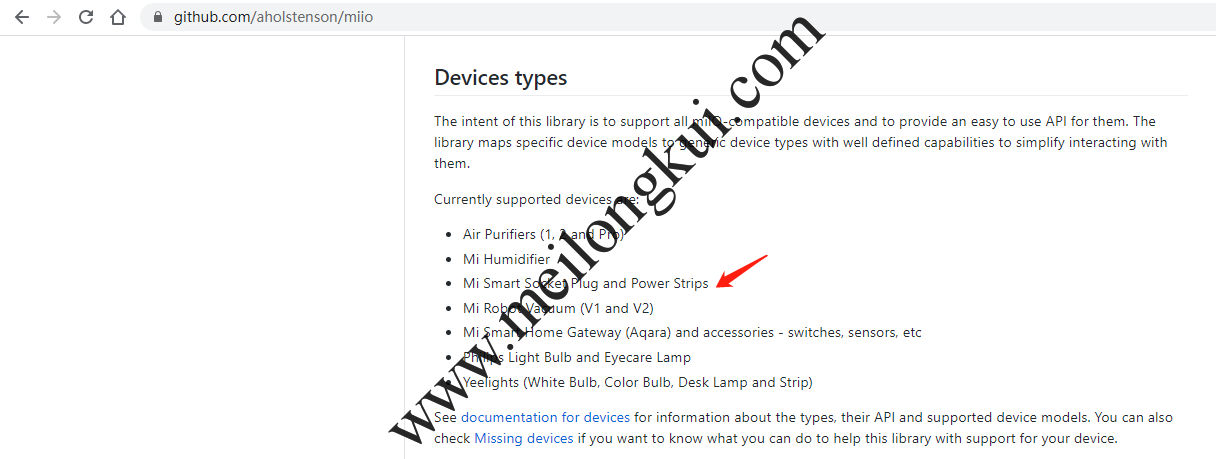
miio
|
1 2 3 |
sudo apt-get install npm sudo npm install -g miio miio discover |
实测有问题(2020年7月25日),如果插座已经配对是获取不到的,信息全都是问号:
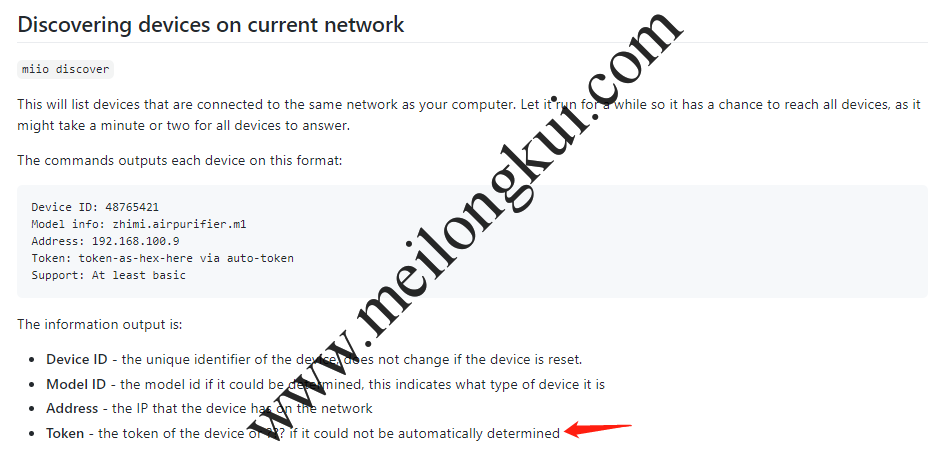
miio无法获取到token
按照官网的说法:
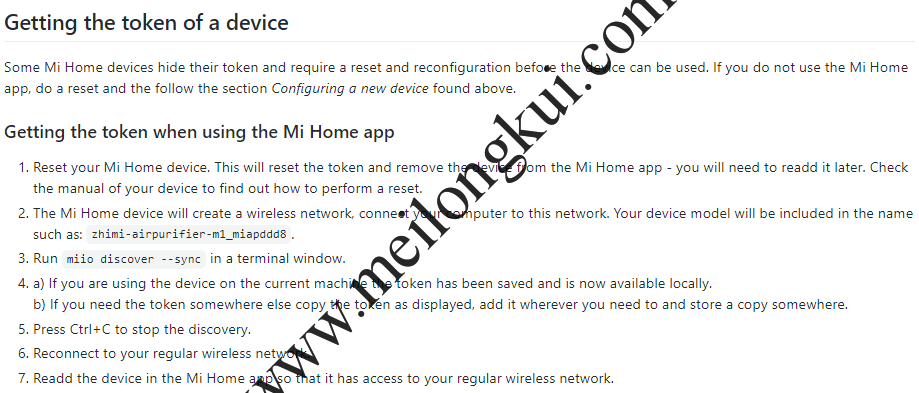
miio重置设备来获取token
重置设备后确实能够获取到了,miio discover命令的输出形如:
|
1 2 3 4 5 |
Device ID: 24***4187 Model info: chuangmi.plug.m3 Address: 192.168.4.1 Token: 03ce89b59**************13e07ea14c5 via auto-token Support: At least generic |
但后面配对后这个token又会发生改变,无法正常使用。
2、使用低版本的米家APP(未验证)
米家v5.4.54版本有一个Bug,其日志文件暴露了设备的Token。安装米家v5.4.54版本,登录小米账户并等待设备连接后可以在/sdcard/SmartHome/logs/Plug_Devicemanager中找到名为yyyy-mm-dd.txt的日志文件,在其中搜索 token即可。
3、使用魔改过的米家APP
https://bbs.hassbian.com/thread-6717-1-1.html中提供了数个魔改过的米家APP,可以选择使用模拟器安装,唯一的问题是魔改过的安全性需要自行把握:
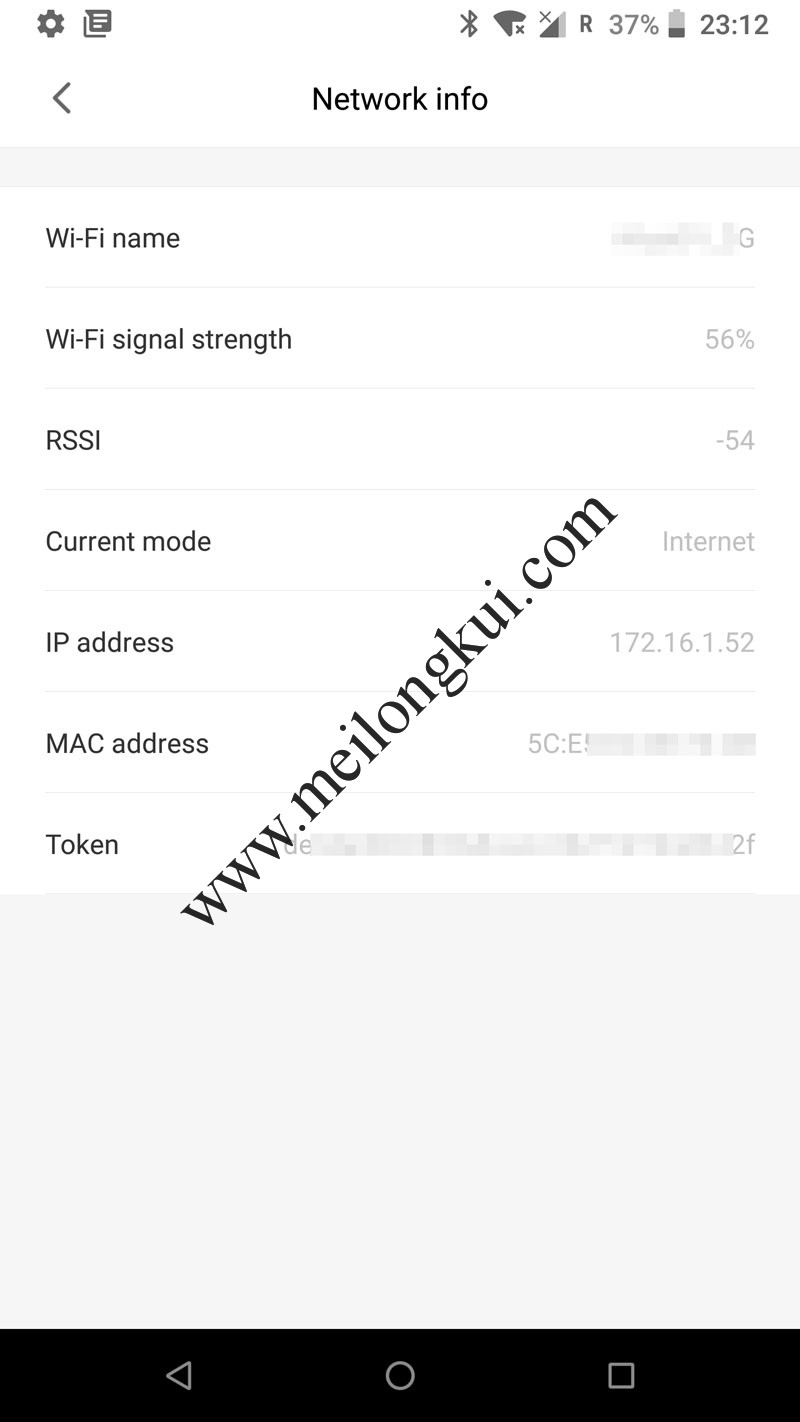
使用魔改过的米家APP获取Token
三、配置
在Home Assistant的Integration中已经有了对应的集成(注意国内访问这个地址需要翻墙,否则是空白的):
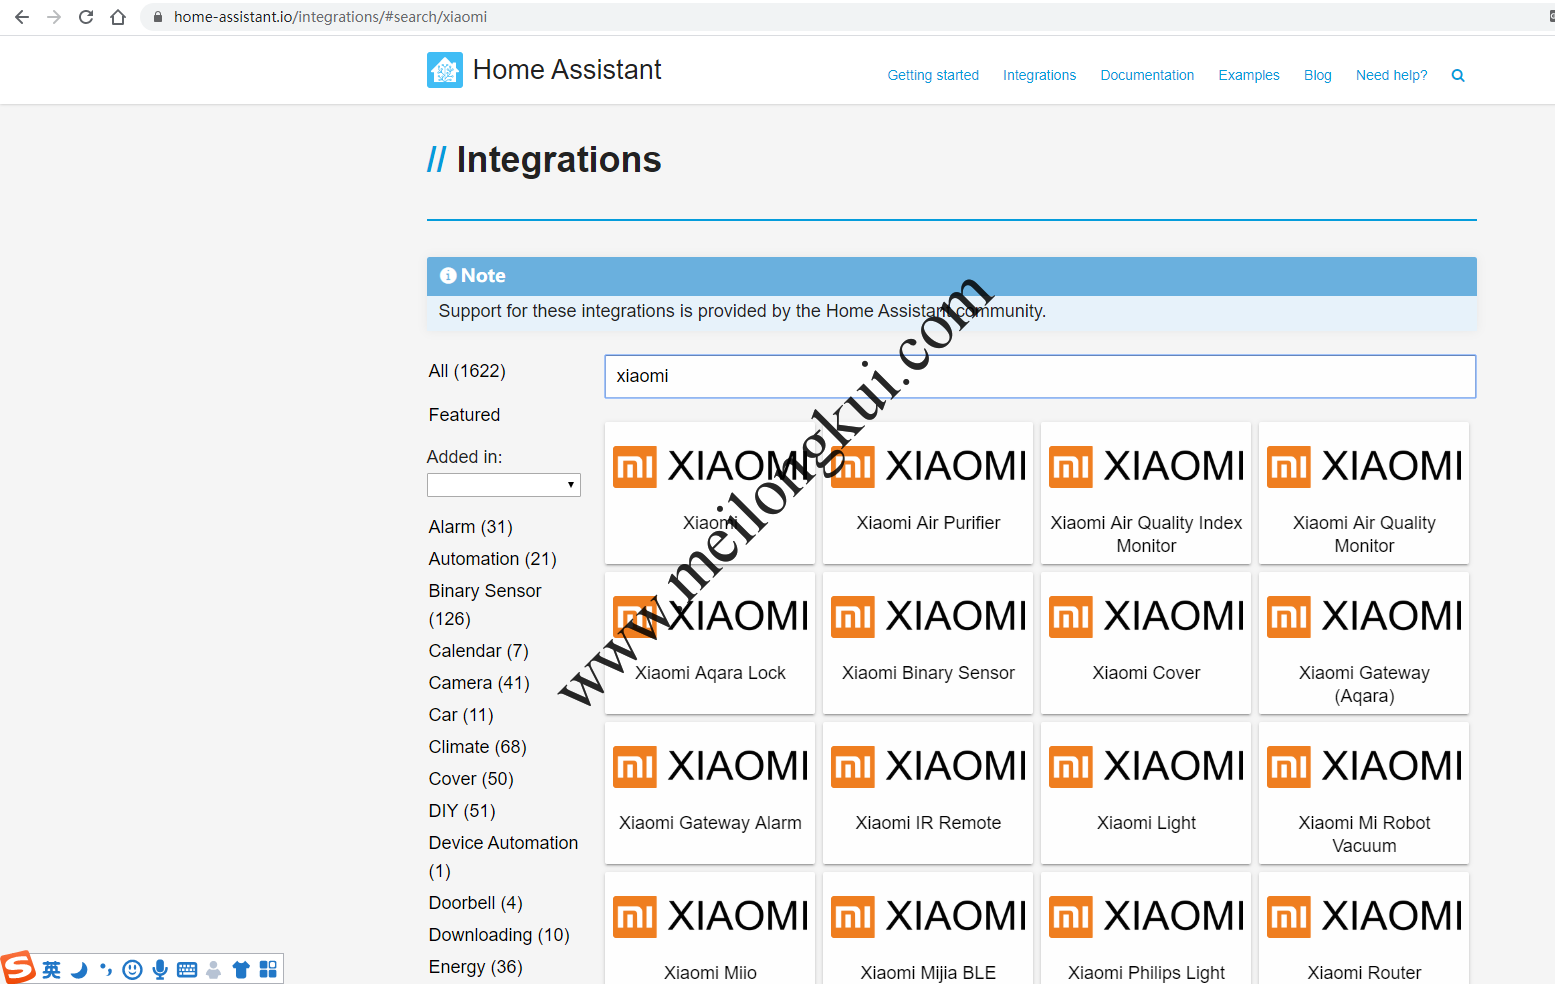
Home Assistant Integration
即:Xiaomi Smart WiFi Socket and Smart Power Strip(https://www.home-assistant.io/integrations/switch.xiaomi_miio),在configuration.ymal中增加如下的配置即可,具体的字段可以看官网描述:
|
1 2 3 4 5 6 |
switch: - platform: xiaomi_miio host: 插座的IP地址 name: xiaomi-plug model: chuangmi.plug.m3 token: 32位的token |
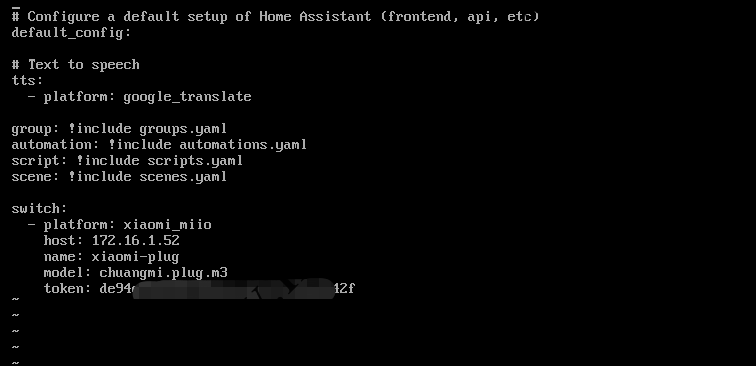
Home Assistant中配置小米智能插座WiFi版
如果是使用的Hassos的VMDK则实际Home Assistant是运行在Docker中的,待虚拟机启动完成后,登陆到Home Assistant从命令行下(用户名root,无密码),然后使用login登录到Linux操作系统:
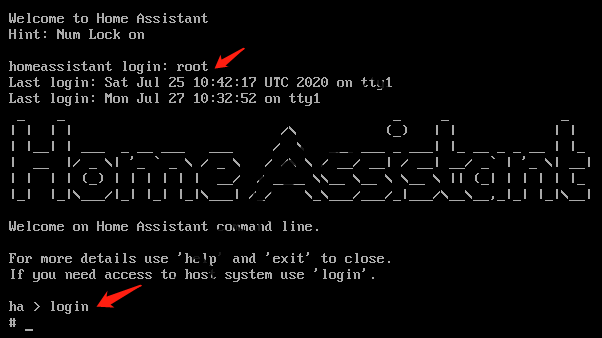
Home Assistant命令行
使用docker ps查看所有的容器,然后登陆到Home Assistant的容器中:
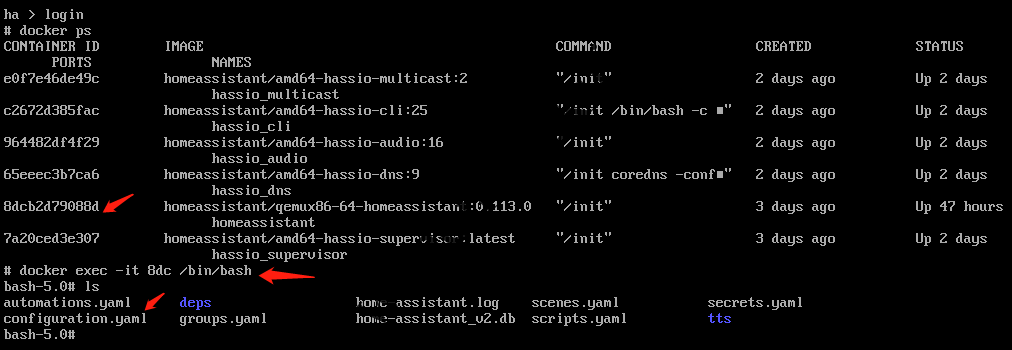
修改Home Assistant的配置文件
并修改配置文件:
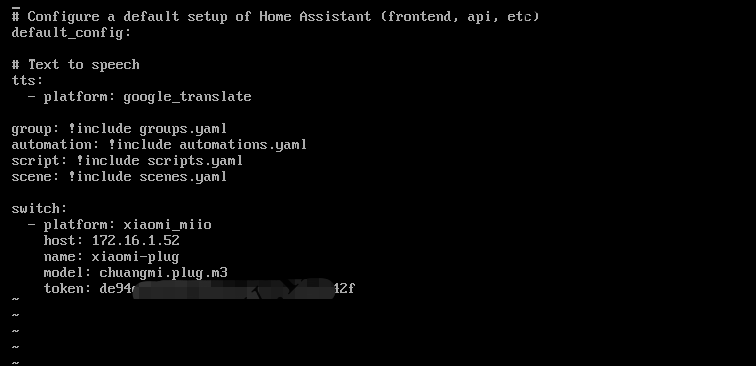
修改Home Assistant的配置文件2
配置文件修改完成后使用core restart重启:

重启Home Assistant容器
再次访问Home Assistant主页即可看到新增的插座了:
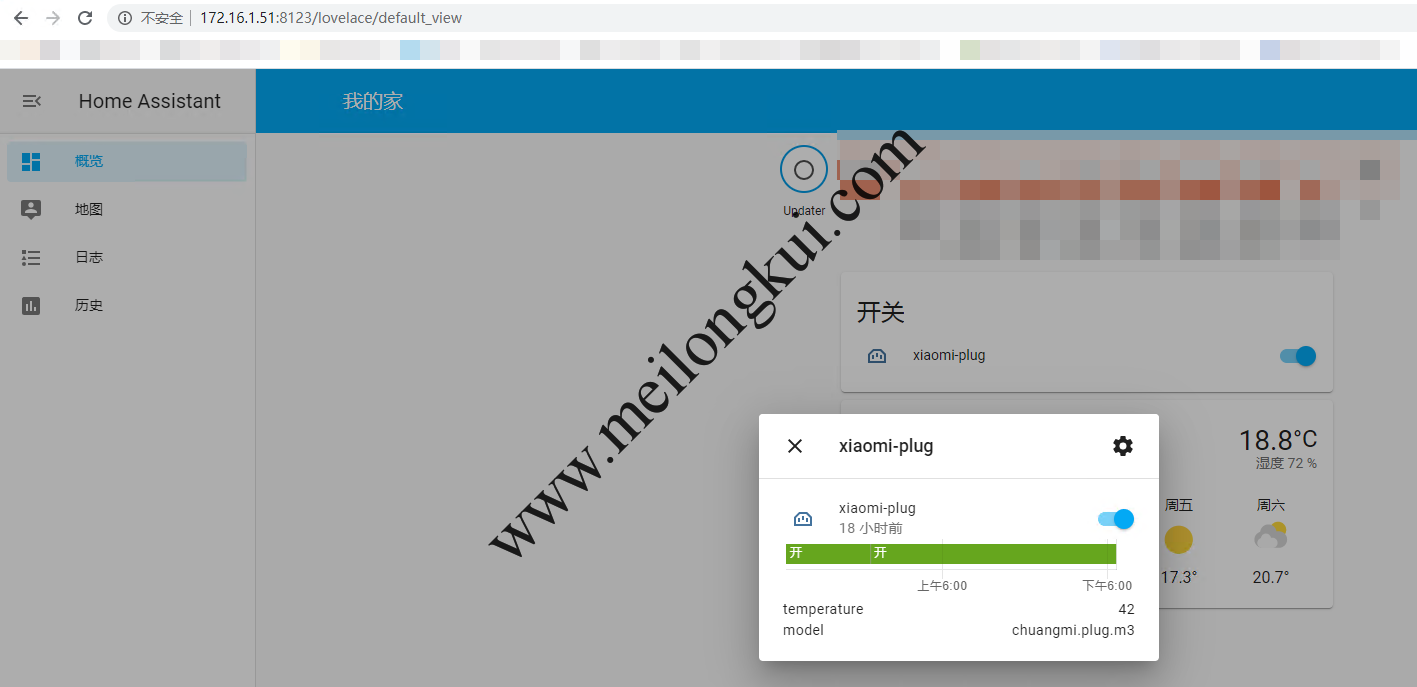
使用Home Assistant控制小米米家智能插座WiFI版
参考文档:
1、https://community.home-assistant.io/t/vmdk-wont-progress-past-random-crng-init-done/178226
2、https://sumju.net/?p=706,标题说的是连接插座,但实际内容不符;不过其中提到了使用miio获取token的方法;
3、https://community.home-assistant.io/t/edit-configuration-yaml-with-hass-io-cli/100421/10,其中提到了如何使用虚拟机镜像并操作其中Home Assistant的Docker,重要;
4、https://www.jianshu.com/p/da4bf815fcdb
转载时请保留出处,违法转载追究到底:进城务工人员小梅 » Home Assistant/Hassos控制小米米家智能插座WiFi版
 进城务工人员小梅